

Tutorial Thursday – Masking ❤ la-la land crafts
Hi!
Tamara here with you. Have you seen the amazing 5th anniversary CLUB kit from la-la land crafts??? It’s amazing and there’s one big stamp of la-la land animals. I decided to show you how to create a similar scene with masking images. It’s super easy, you’ll see.
What you need:
watercolour paper
stamping block or stamping tool
Archival ink – Jet black
post it notes
la-la land items you need for this image:
August 2018 club kit
Step 1:
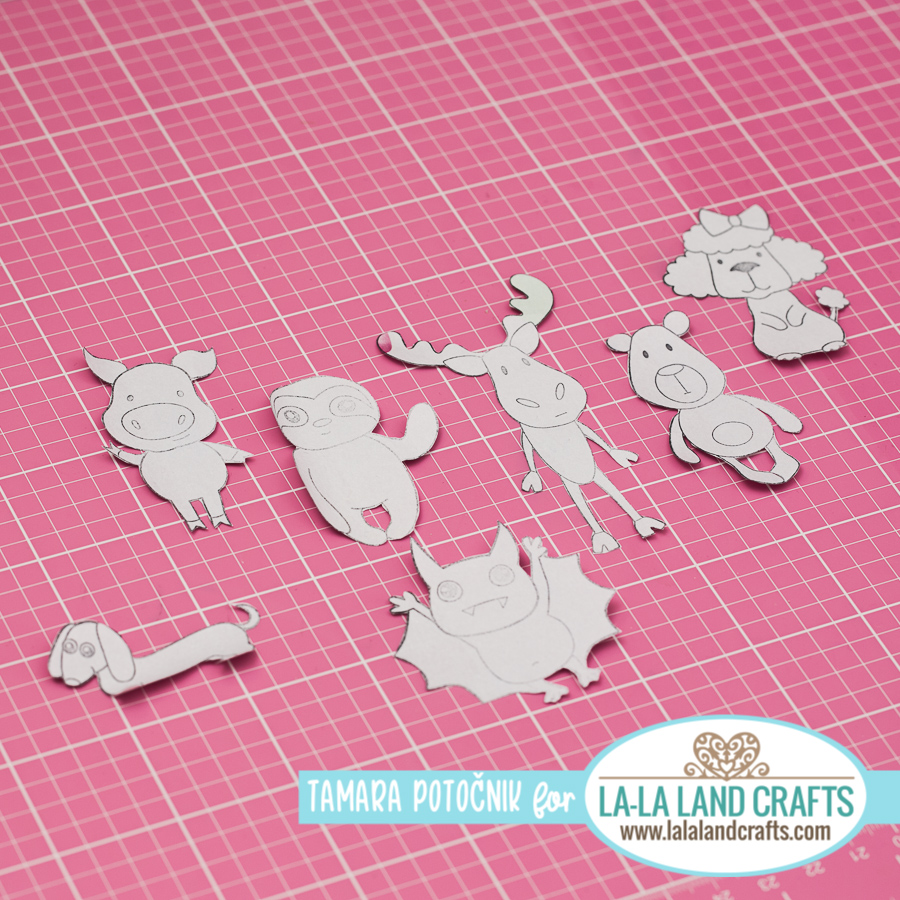
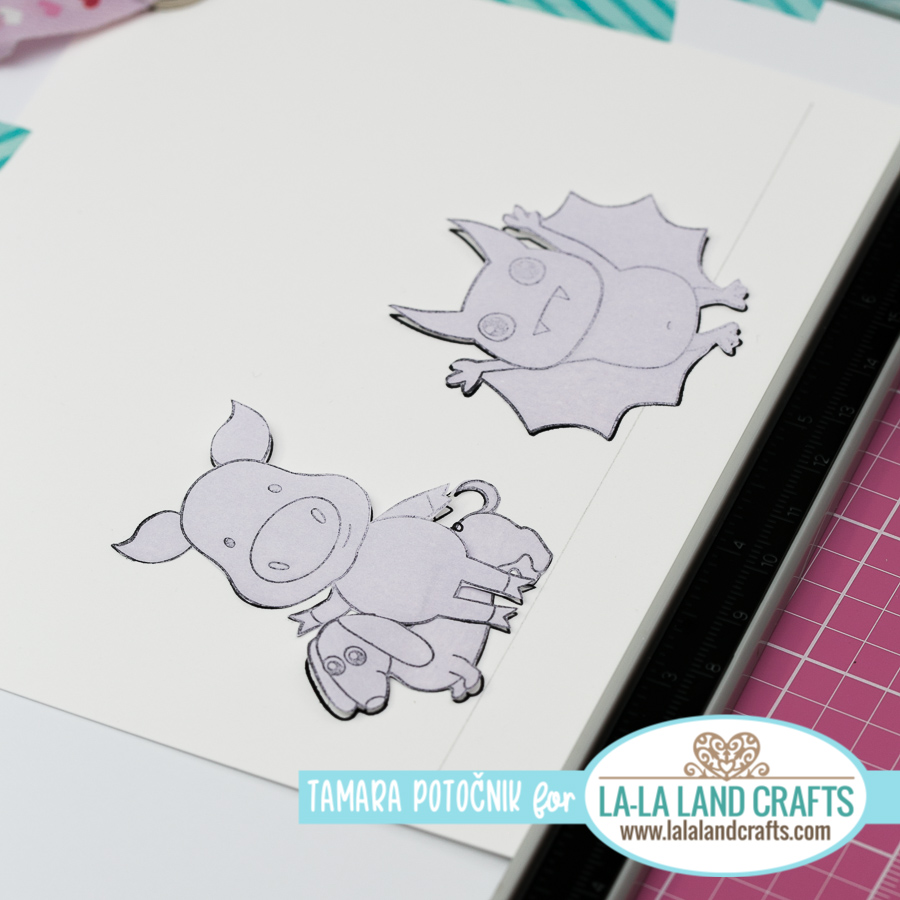
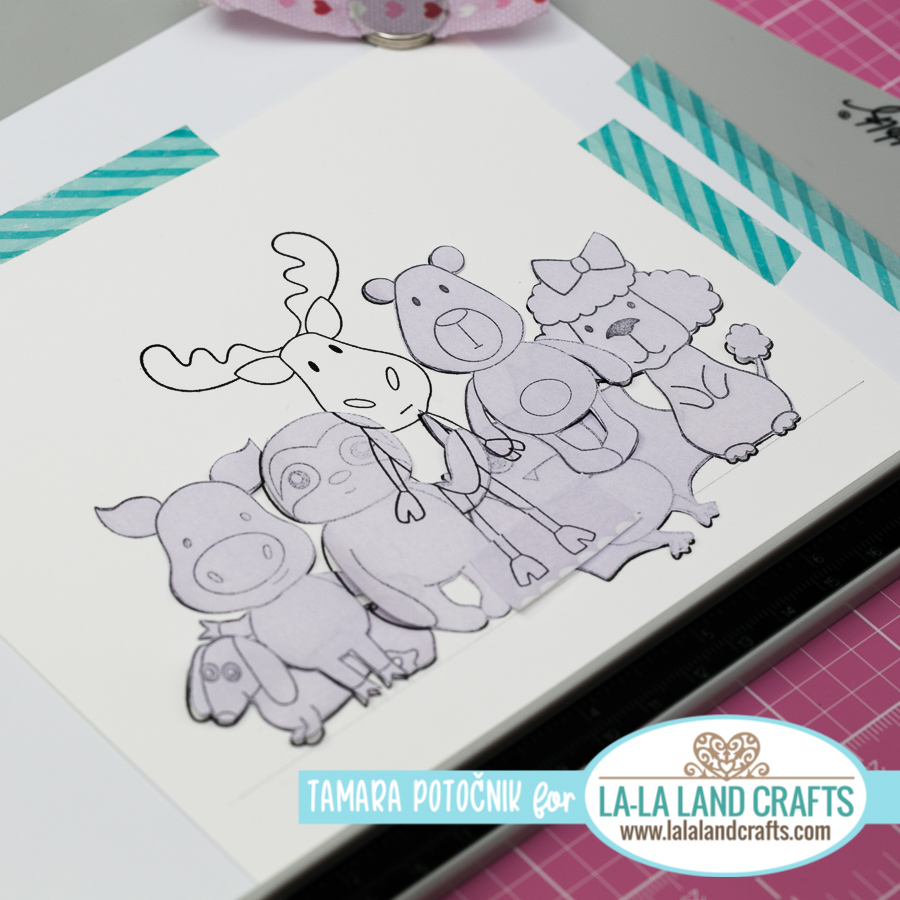
Choose the animals you want to mask together. Stamp them on post it notes so that one part of the animal is stamped on the front of the sticky stuff. Fussy cut them.
Step 2:
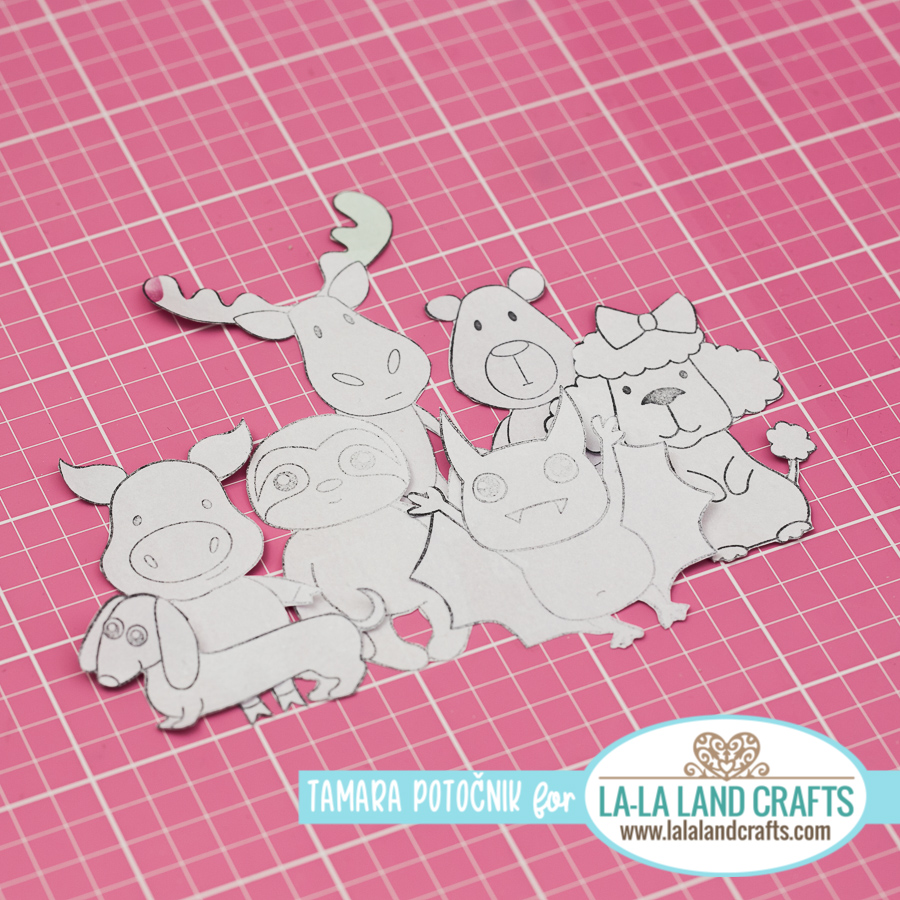
Place them together like you want the final image to look like. Now you can move them arround until you find the position that suits the image the most. Bigger images go in the back, smaller in the front. Bear image is rather small but I wanted it too be next to the moose so I put it a bit higher and the bat is covering his legs so you can’t really see that it’s standing in the air. hehe
As you can see all the animals except the bat are lined up.
Step 3:
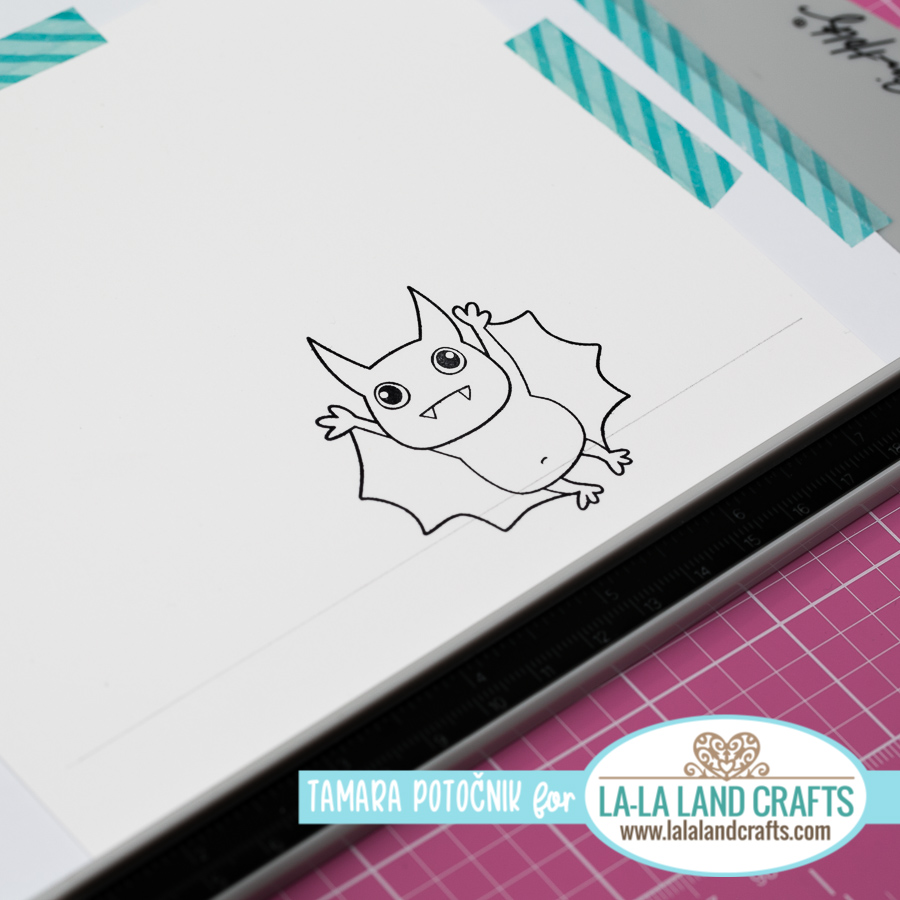
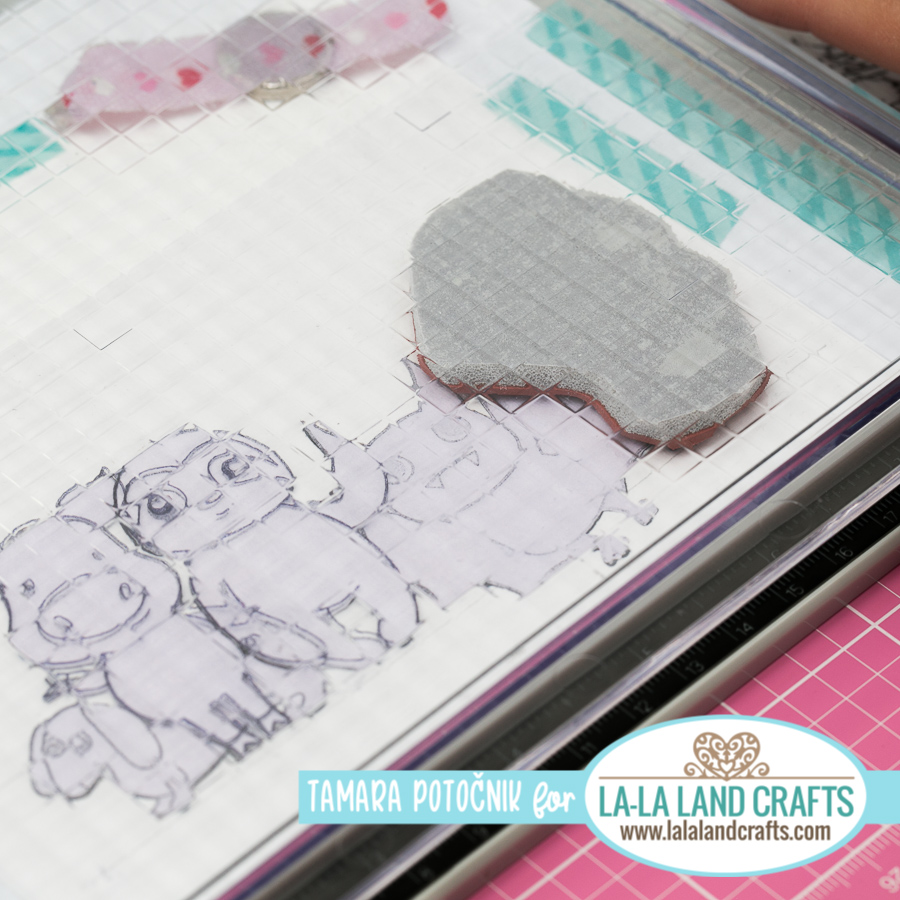
Take your watercolouring paper (5″ x 6″) and place it on your stamping tool. I usually glue down the edges with some washii tape, so that the paper doesn’t move.
Take your ruller and draw a thin line just a bit above the bottom of the paper. That’s where the animals will be lined up. Bat image is stamped a bit lower so leave enough space on the bottom.

Step 4:
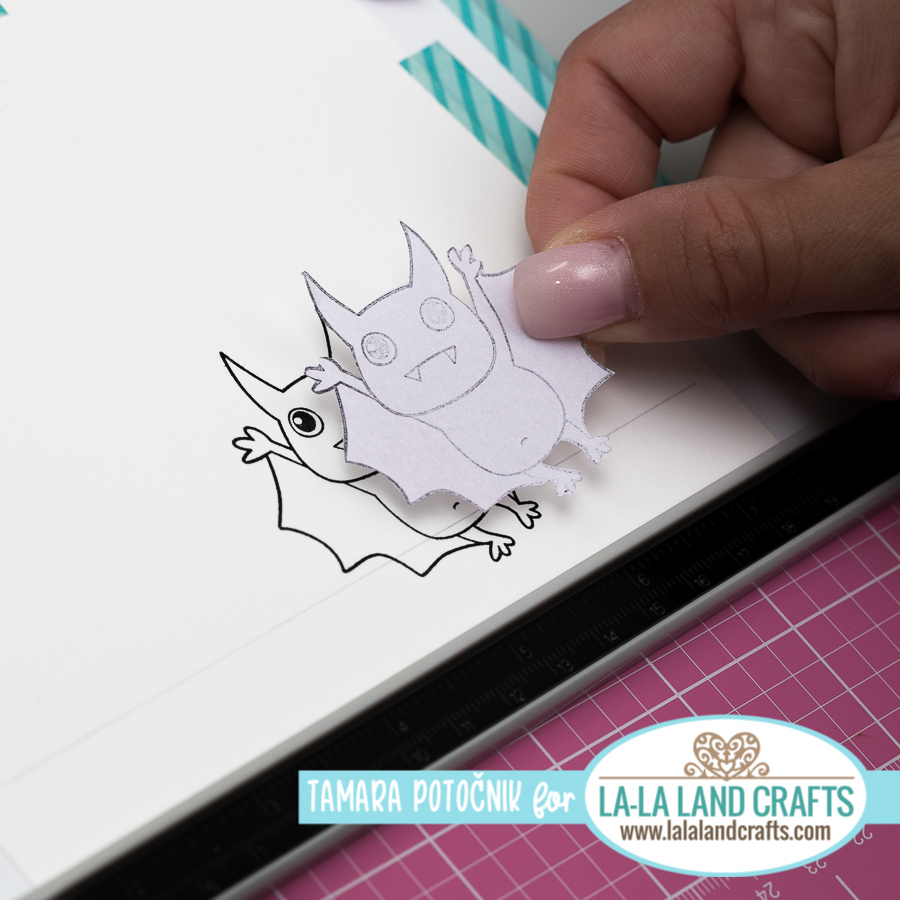
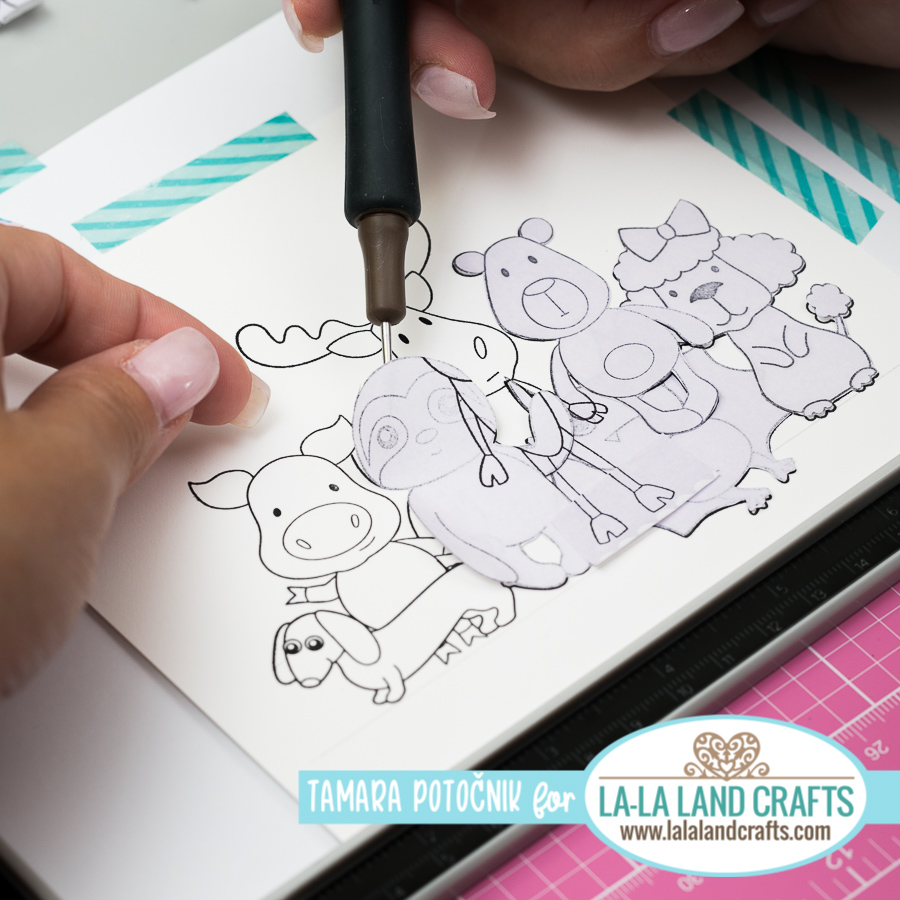
Bat is the image that we’re stamping first since it’s in the front of our masked image. After it’s stamped cover it with the fussy cut image.
Step 5:
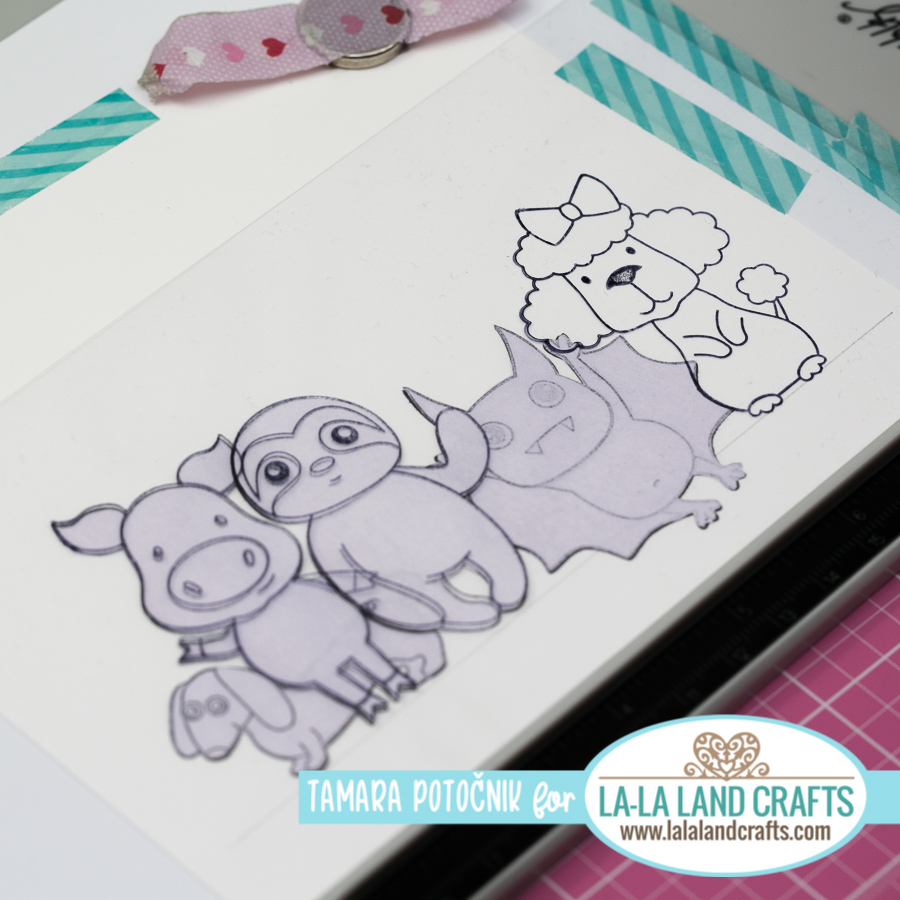
Next is the loooong dog. Stamp it on the paper and then cover it with fussy cut image. The front of the image is now done.

Step 6:
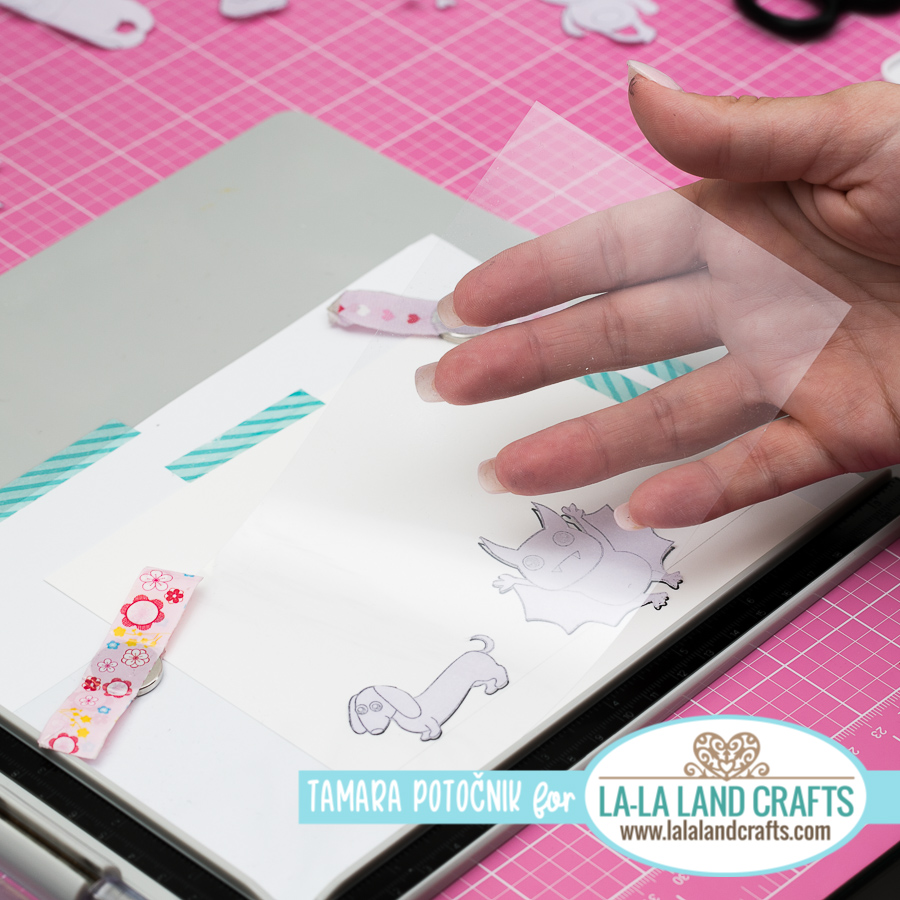
To make sure all the next images are standing straight and that they are placed perfectly I use acetate. I place it on the watercolour paper and stamp my image there first so that it’s lined up ok. If it’s not I can easily move my watercolour paper or move the image and then stamp it again.
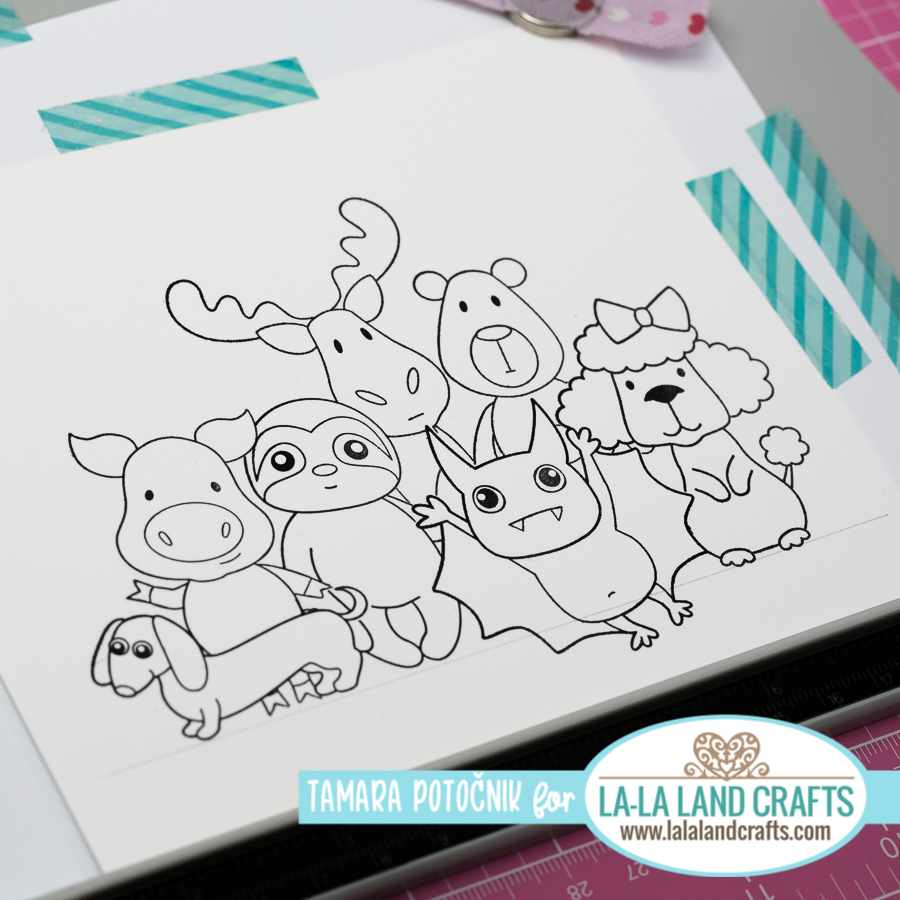
Step 7:
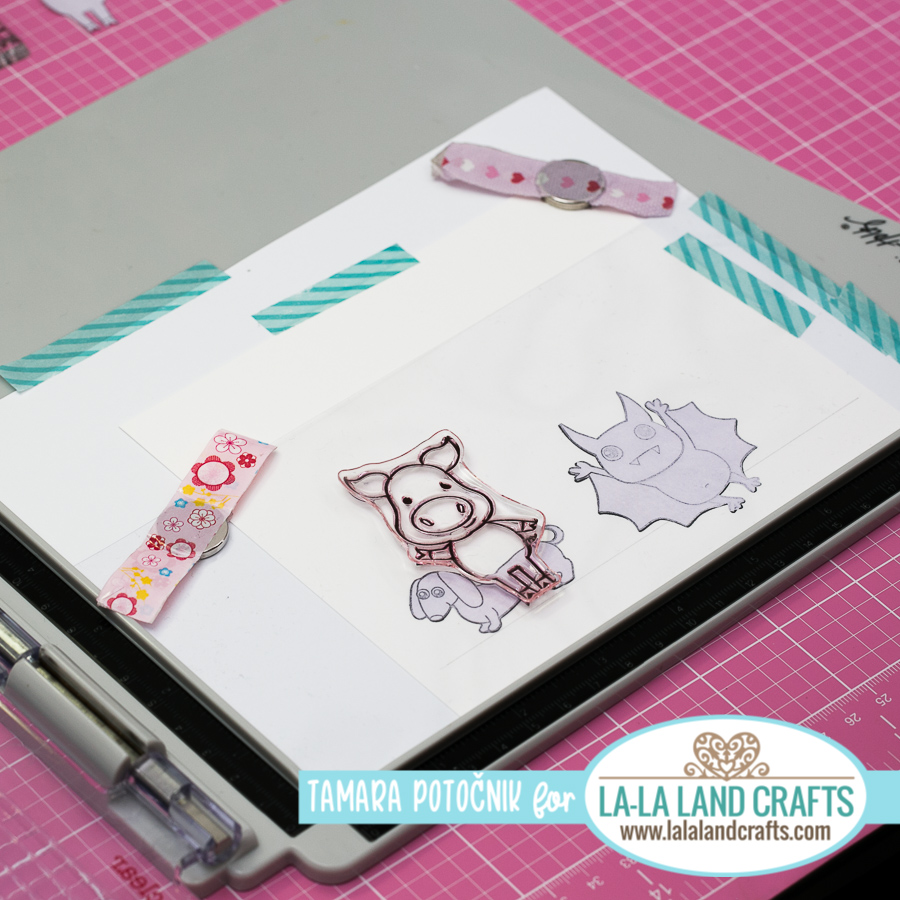
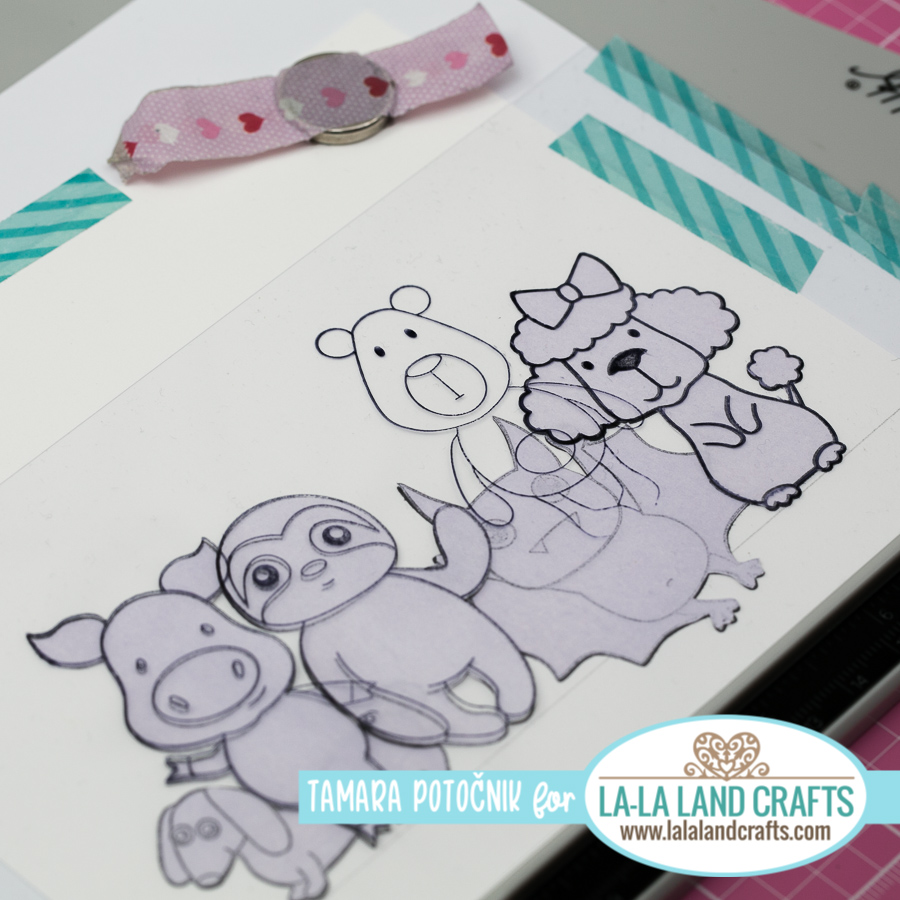
I often take a picture with my phone of the lined up images just to make sure that I use the same order when stamping them.
I repeat the same process with all the rest of the animals.

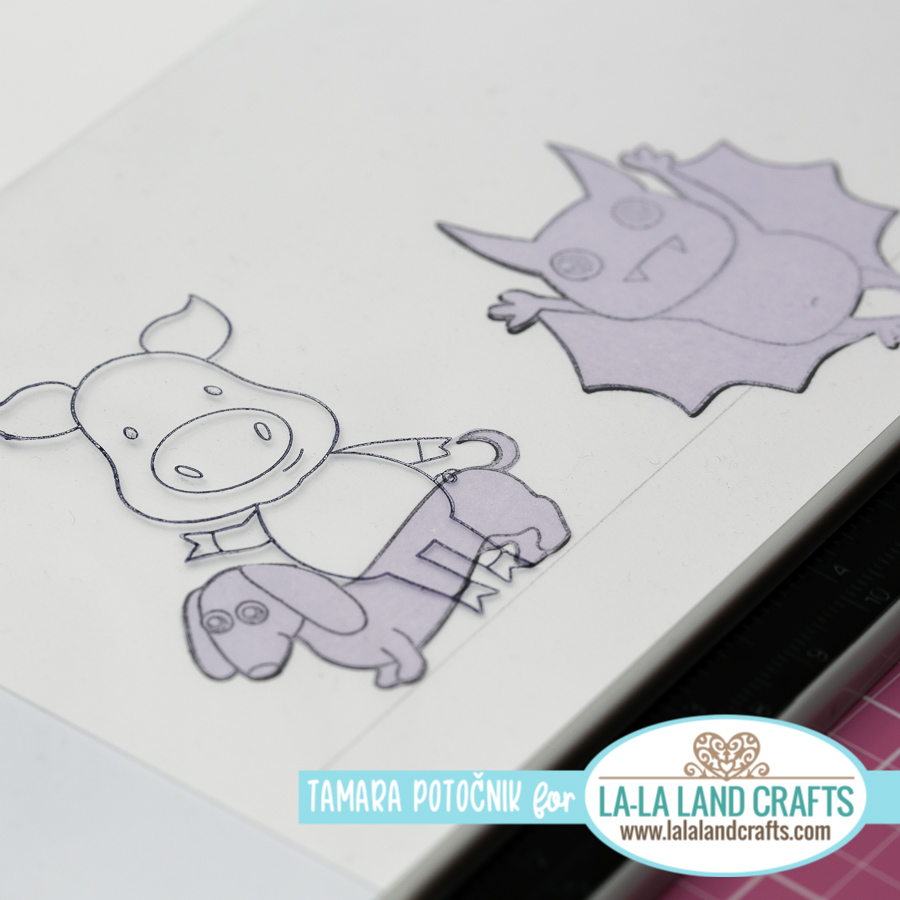
See how high up the bear image is?! You won’t even notice later that he’s not that tall.
Step 8:
After stamping all the images, carefully remove the fussy cut images and there you go!
here’s the masked image I chose to do. You can always choose different animals or characters for your project.
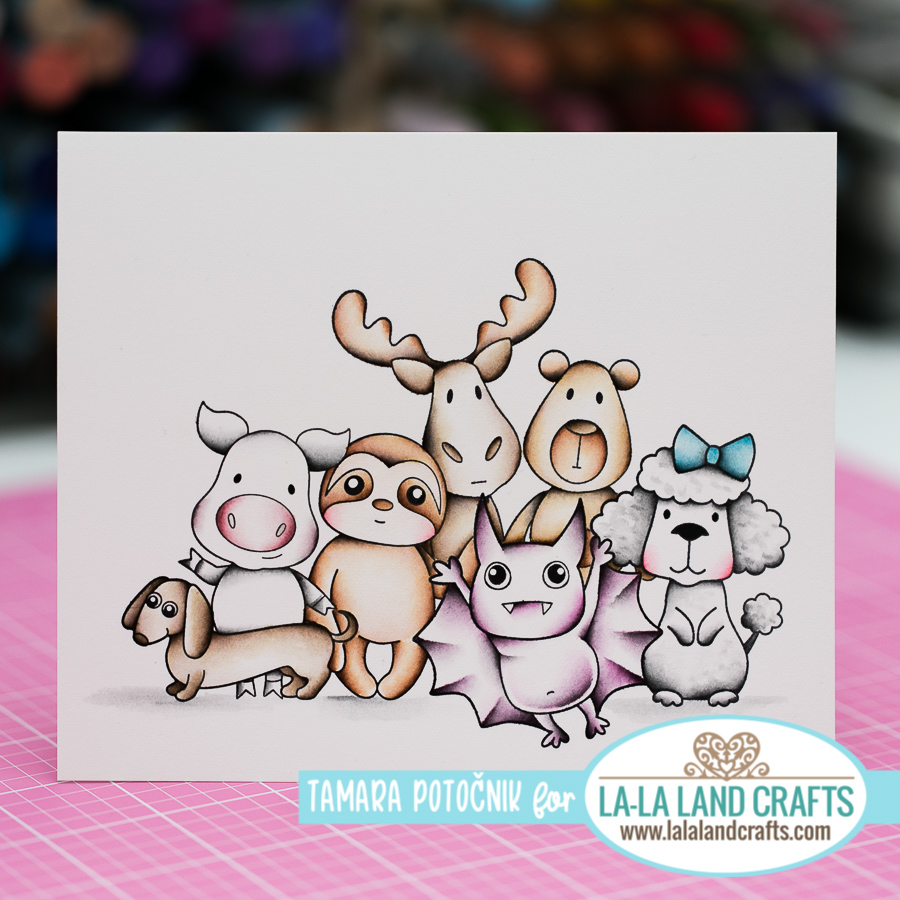
I even found some time to colour them up.
That’s all from me today.
Hugs, t.
2 komentarja
Deni - Angel Handmade Papercraft
Love your colouring as always, you are such a fantastic watercolourer 🙂 xx
Tamara
Thank you soooo much!
Hugs, t.