

Christmas Candy holder ☆ C.C. Designs
Hi!
Tamara here with you. I made a tutorial on how to make a Christmas Candy holder using C.C. Designs stamps and dies.
What you need:
Make a card #3 dies
pattern paper
white cardstock
2 eyelets
twine
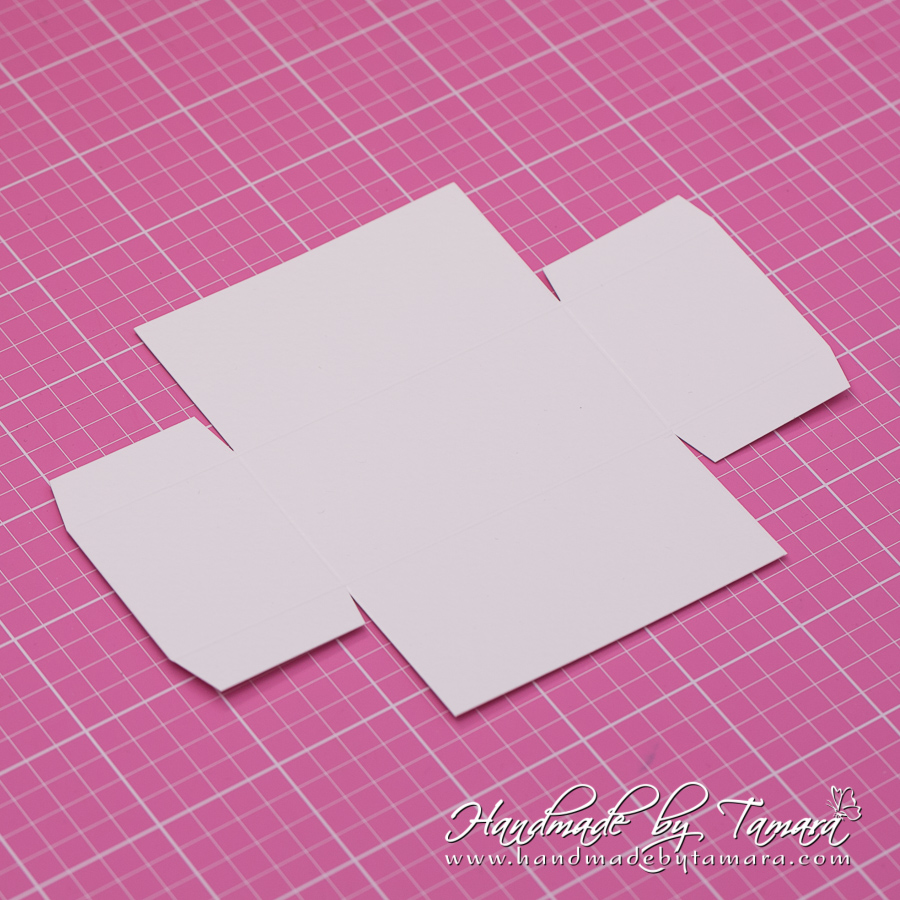
Step 1:
Cut 4.5″ x 6″ rectangle from white cardstock. Make score lines at 1.5″ and 3″ (4.5″ long side) and at 1.5″ and 4.5″ (6″ long side).

Cut as shown.
Step 2:
Fold at score lines and apply double sided tape.


Once glued together you get the base of the Christmas candy holder.

Step 3:
Make die cuts. Cut 4 of the biggest tags from the Layering tag set, 2 from white cardstock and 2 from design paper.


Step 4:
Cut the stitching part from the tags cut from design paper.

Glue together one white and one cut from design paper.

Step 5:
Use crop-a-dile and make holes for eyelets. Each hole is 0.5″ from the top.


Step 6:
Glue the cirle on the middle of the tag you chose to be the front of the candy holder.

Apply glue or double sided tape to the back of the tags.

Glue them to the base.


Cut two small 1 3/8″ x 1 3/8″ squares and glue them to the side of the holder.


Step 7:
Choose the image you want to use for the front, colour it and cut it out using matching outline dies.

Use foam dots to pop up the image.

Glue the image to the base.

Step 8:
Use glitter glue on the image. Add some candy inside and tie it all together with a twine.

Hugs, t.
7 Comments
Bianca van Tilburg.
Wonderful and what a nice idea.
Hugs Bianca
Bianca's Scrapcards
Jeanne Packard
Beautiful job. Thanks for sharing. Hugs and Blessings Jeanne
Laila B.
Love it!!!
Natasa
Kaka luštna ideja! Čudovito si jo izdelala!
OneSmittenKitten79
Thank you for the detailed tutorial ! This is so very cute and I can’t want to make some of these ❤️
Nini Scrap
its a beautiful gift thank you for the tutorial!!
Valerie Rangel
Too too too cute!!!