

Accordion card tutorial ☆ C.C. Designs
HAPPY NEW YEAR!!!!!
Today I’m sharing with you a tutorial made for C. C. Designs design team. This is an easy card to make and you can use it for different opportunities.
What you need:
white cardstock
design paper
distress ink pads
scissors
double sided tape
liquid glue
C.C. Designs items you need:
Make a tag
Make a card #3
Step 1:
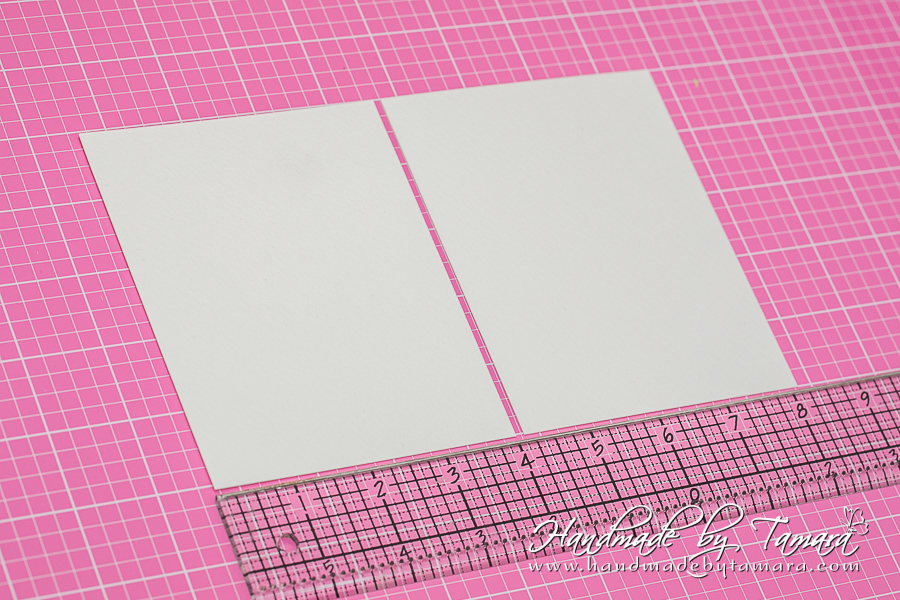
Cut two pieces of heavy white cardstock (300g) measuring 4″ x 5″.
Step 2:
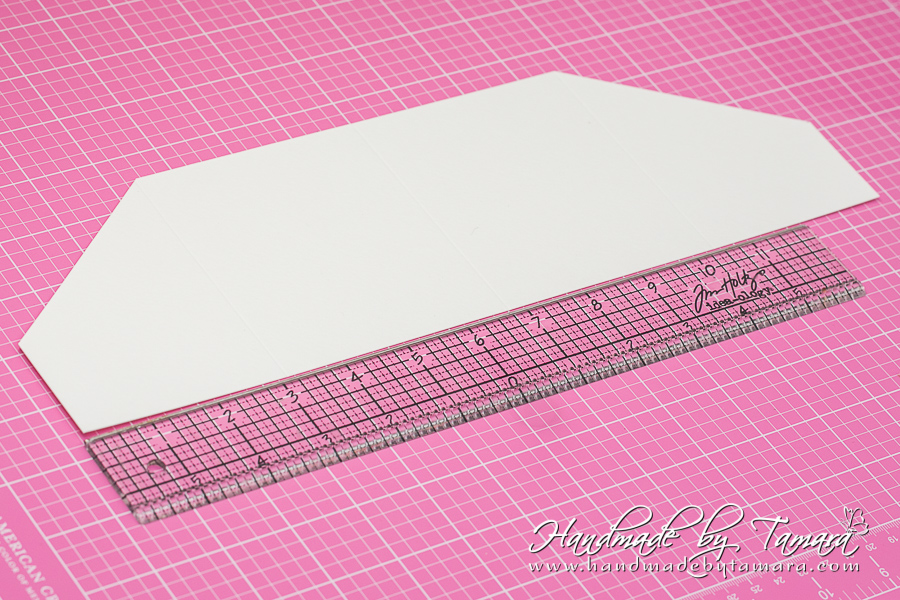
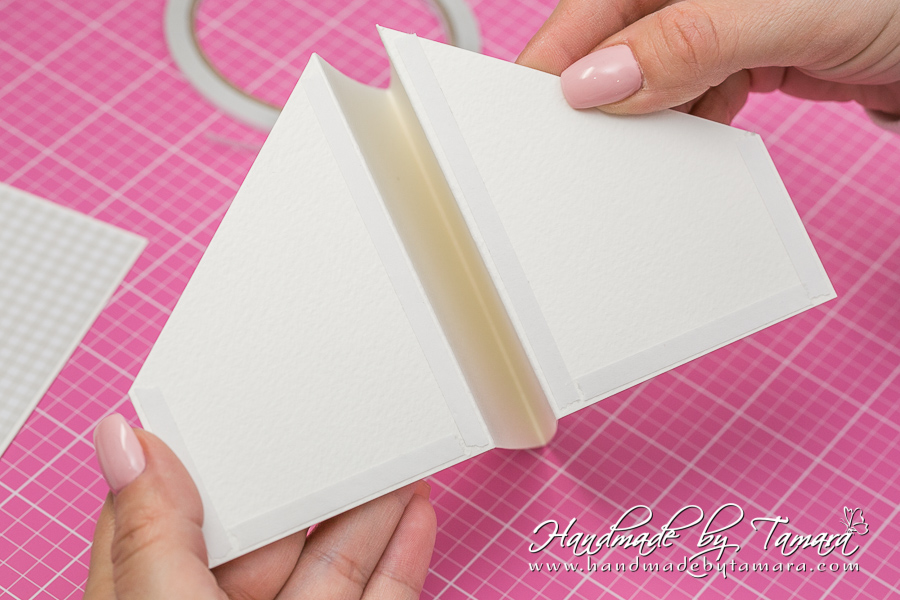
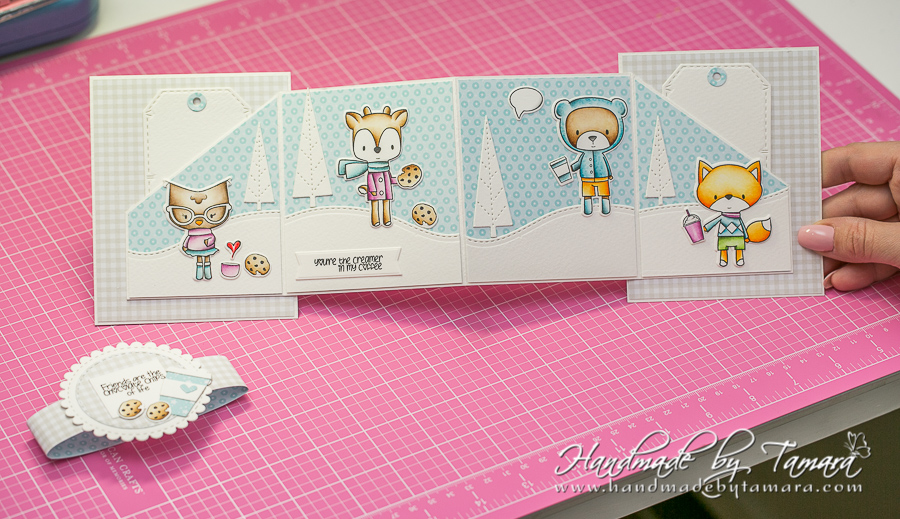
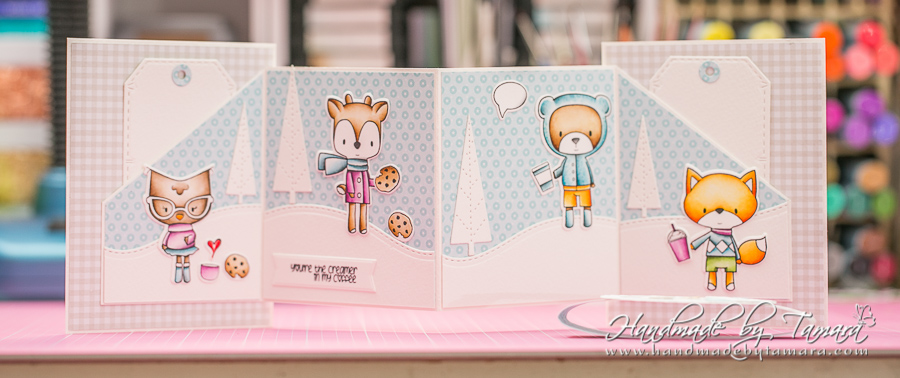
Cut one long white rectangle measuring 13,5″. You can asemble this one together from two smaller pieces. Then take your scoring board and make score lines at: 3 1/8″ – 6 3/4″ – 10 3/8″. As you can see on the picture the first square and the last one are cut. I cut them diagonally at 2 3/8″ on each side. This is the center piece of your accordion card.
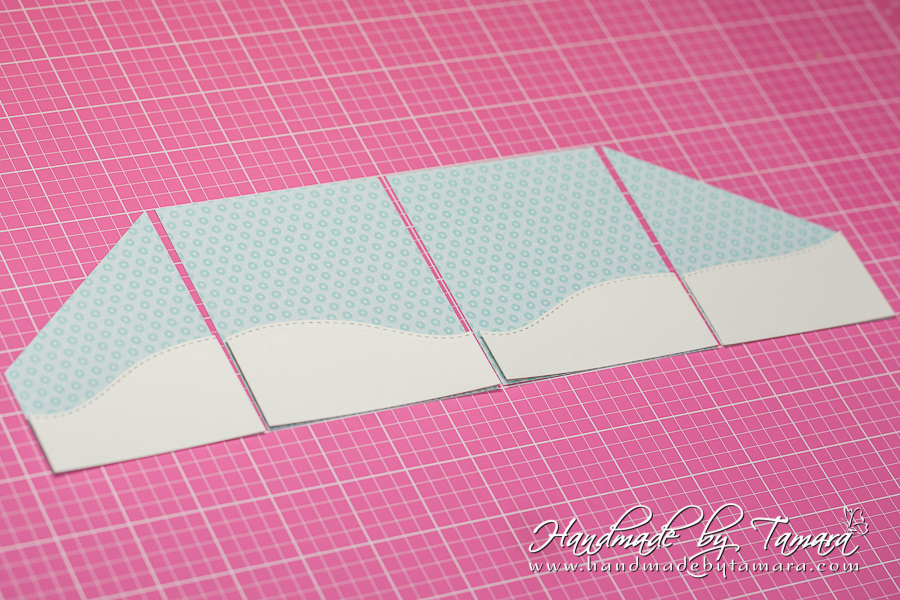
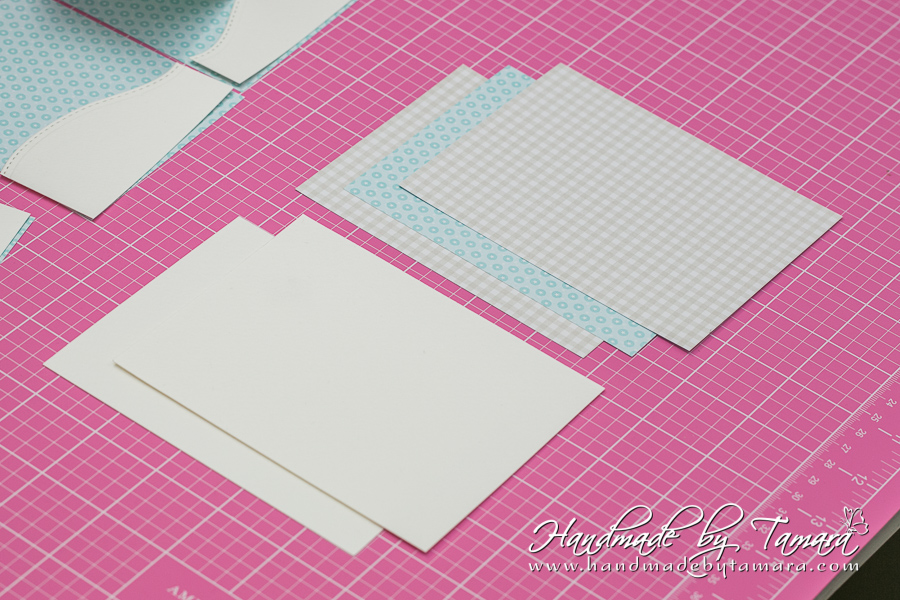
Take chosen design paper and cut 4 rectangles:
2x 3″ x 4″
2x 3,5″ x 4″
On the smaller ones and cut out the triangles like we did with the center piece. Line them all together.

Step 3:
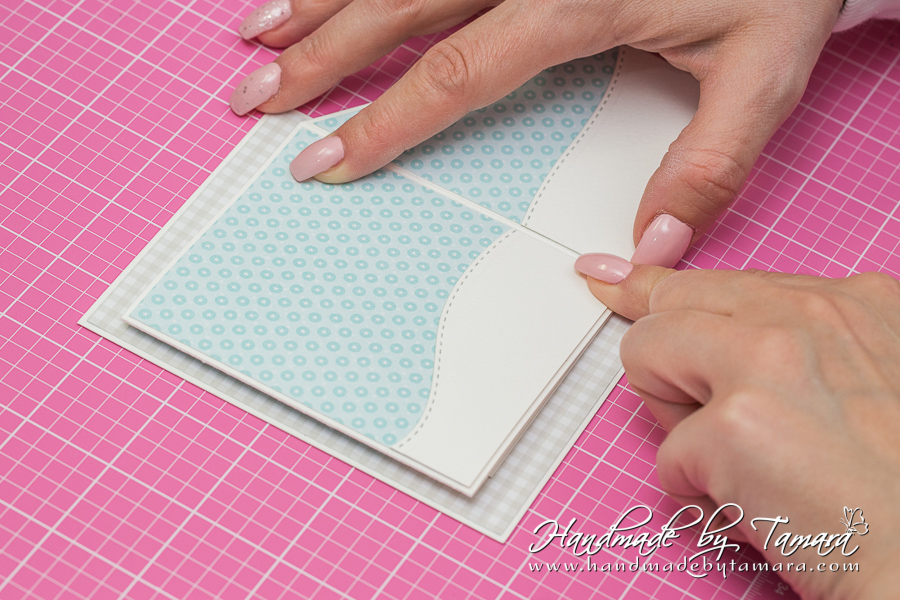
Cut another 4 rectangles from white cardstock (the same sizes as the ones cut from design paper) and use one of the stitched borders to make landscape.
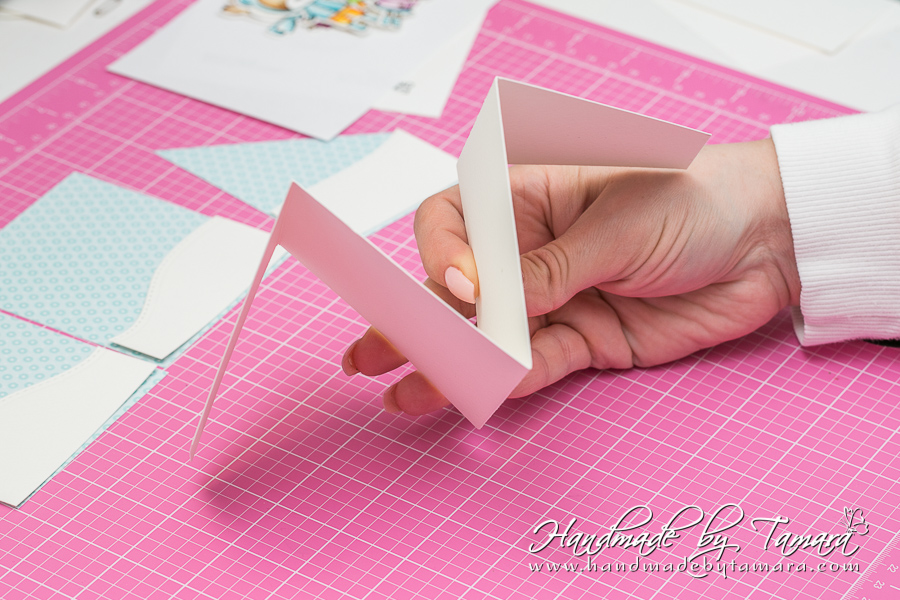
Fold the center piece.
Step 4:
You already have 2 white cardstock rectangles from step 1, now you have to cut 3 rectangles from design paper. Two for the inside and one for the front of the card. Rectangles measure 3 7/8″ x 4 7/8″.
Step 5:
Apply double sided tape on the center piece as shown.
Step 6:
Adhere the center piece on the sides. Be careful that you adhere it close to the right edge, because when it’s closed the center piece mustn’t look out of the closed card.

Step 7:
Add two tags on each side of the center piece.

Step 8:
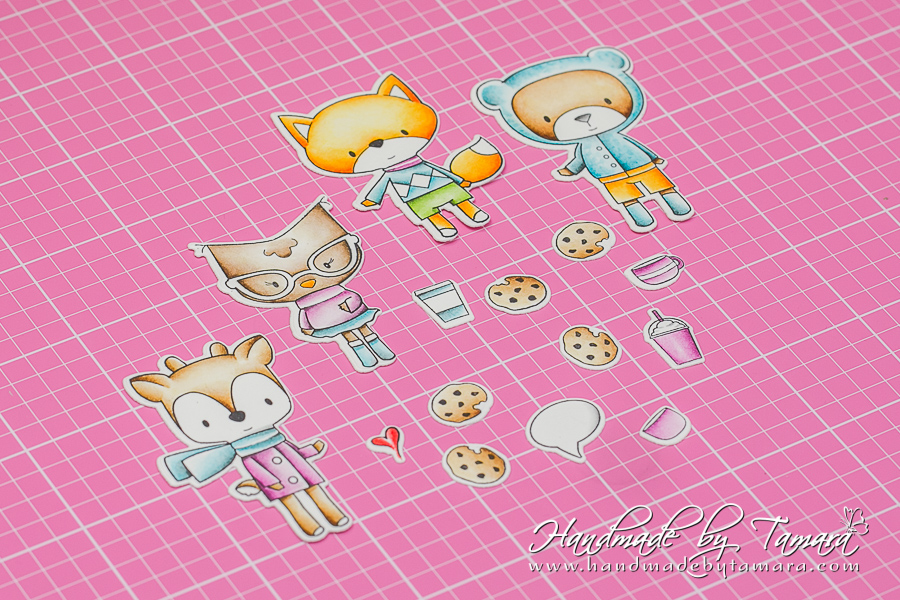
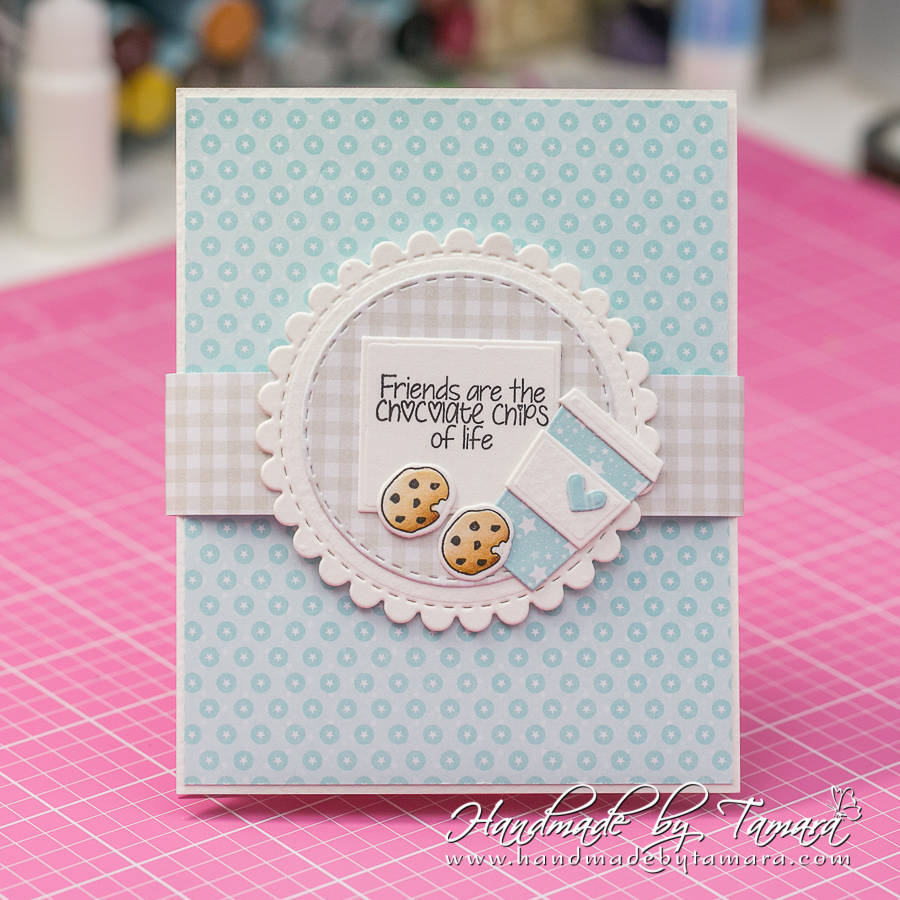
Colour in the chosen images. I decided to make a coffee and cookies forest party. heheh … Cut out images using outline dies.
Step 9:
To make the front you cut one 12″ stripe of paper, 1″ wide. Then simply wrap it around the closed card and glue together. Make sure you leave enough space on each side so that can be easily pushed up or down to open the card.
Decorate the front as you desire.
Step 10:
Adhere the animals, add trees and other accessories stamps.
That’s it. I hope you like my tutorial and it encouraged you to try it yourself.
Hugs, t.
5 Comments
Dena
OMG! This is so adorable! Your fabulous coloring, oh my!!!
Hugs, Dena
Irene Mendes
Omg Tamara, it’s absolutely amazing as usual. Love the colors and the card layout. Well I love everything :)) Happy New Year my friend
marilynwillauer
OH MY. . . This is absolutely precious! Amazing layout, colors and coloring. Whomever gets this card will feel over the moon in happiness!!!
Alexandra♥
Beautiful and sweet!
Ustvarjalni utrinki Tamara P.
Čudovit tutorial in lepa celota
vse dobro v 2019
Tamara